

A Pane-ful Lesson

Christopher Schwarz
Jan. 5, 2024
When teaching Kale, I have kept my instruction to a minimum. I point out potential dangers, of course. But I don’t talk about theory or technical stuff like bevel angles or the set of saw teeth. Yes, there’s a secondary bevel. Yes, set exists.
I’ve watched too many students become paralyzed by everything they’ve read. When I tell them to do something during class, they think of the 20 other ways to do the thing, and all those affect the way they approach and do the work.
This might sound like a suicidal statement for a writer and publisher, but here goes: Maybe y’all shouldn’t read so many books before you start making things.
So far, my approach with Kale has worked. But today we started into cutting her legs to length. This is a compound-angle cut on a tapered workpiece. Should we talk about saw theory?
Nope. F-it. Let’s find out what happens. I sawed one of my legs. Showed her how to advance one line at a time around the octagonal leg. And how to correct by Englishing the saw plate against the kerf wall.
I handed her my carcase saw.
Megan said: “Wait, aren’t you even going to let her practice?”
“Whelp,” Kale said. “Too late.”
Kale took the first cut slow. Really slow – maybe 10 minutes on one leg. I worked on other stuff so I wasn’t vulturing over her work. The second leg took her 5 minutes. The last two legs went pretty quickly.
She put the chair on the benchtop and looked disappointed.
“I can see a little gap here where the leg doesn’t meet the floor evenly,” she said.
“It only matters if the legs are uneven,” I replied. “The gap will never show to a normal human being.”
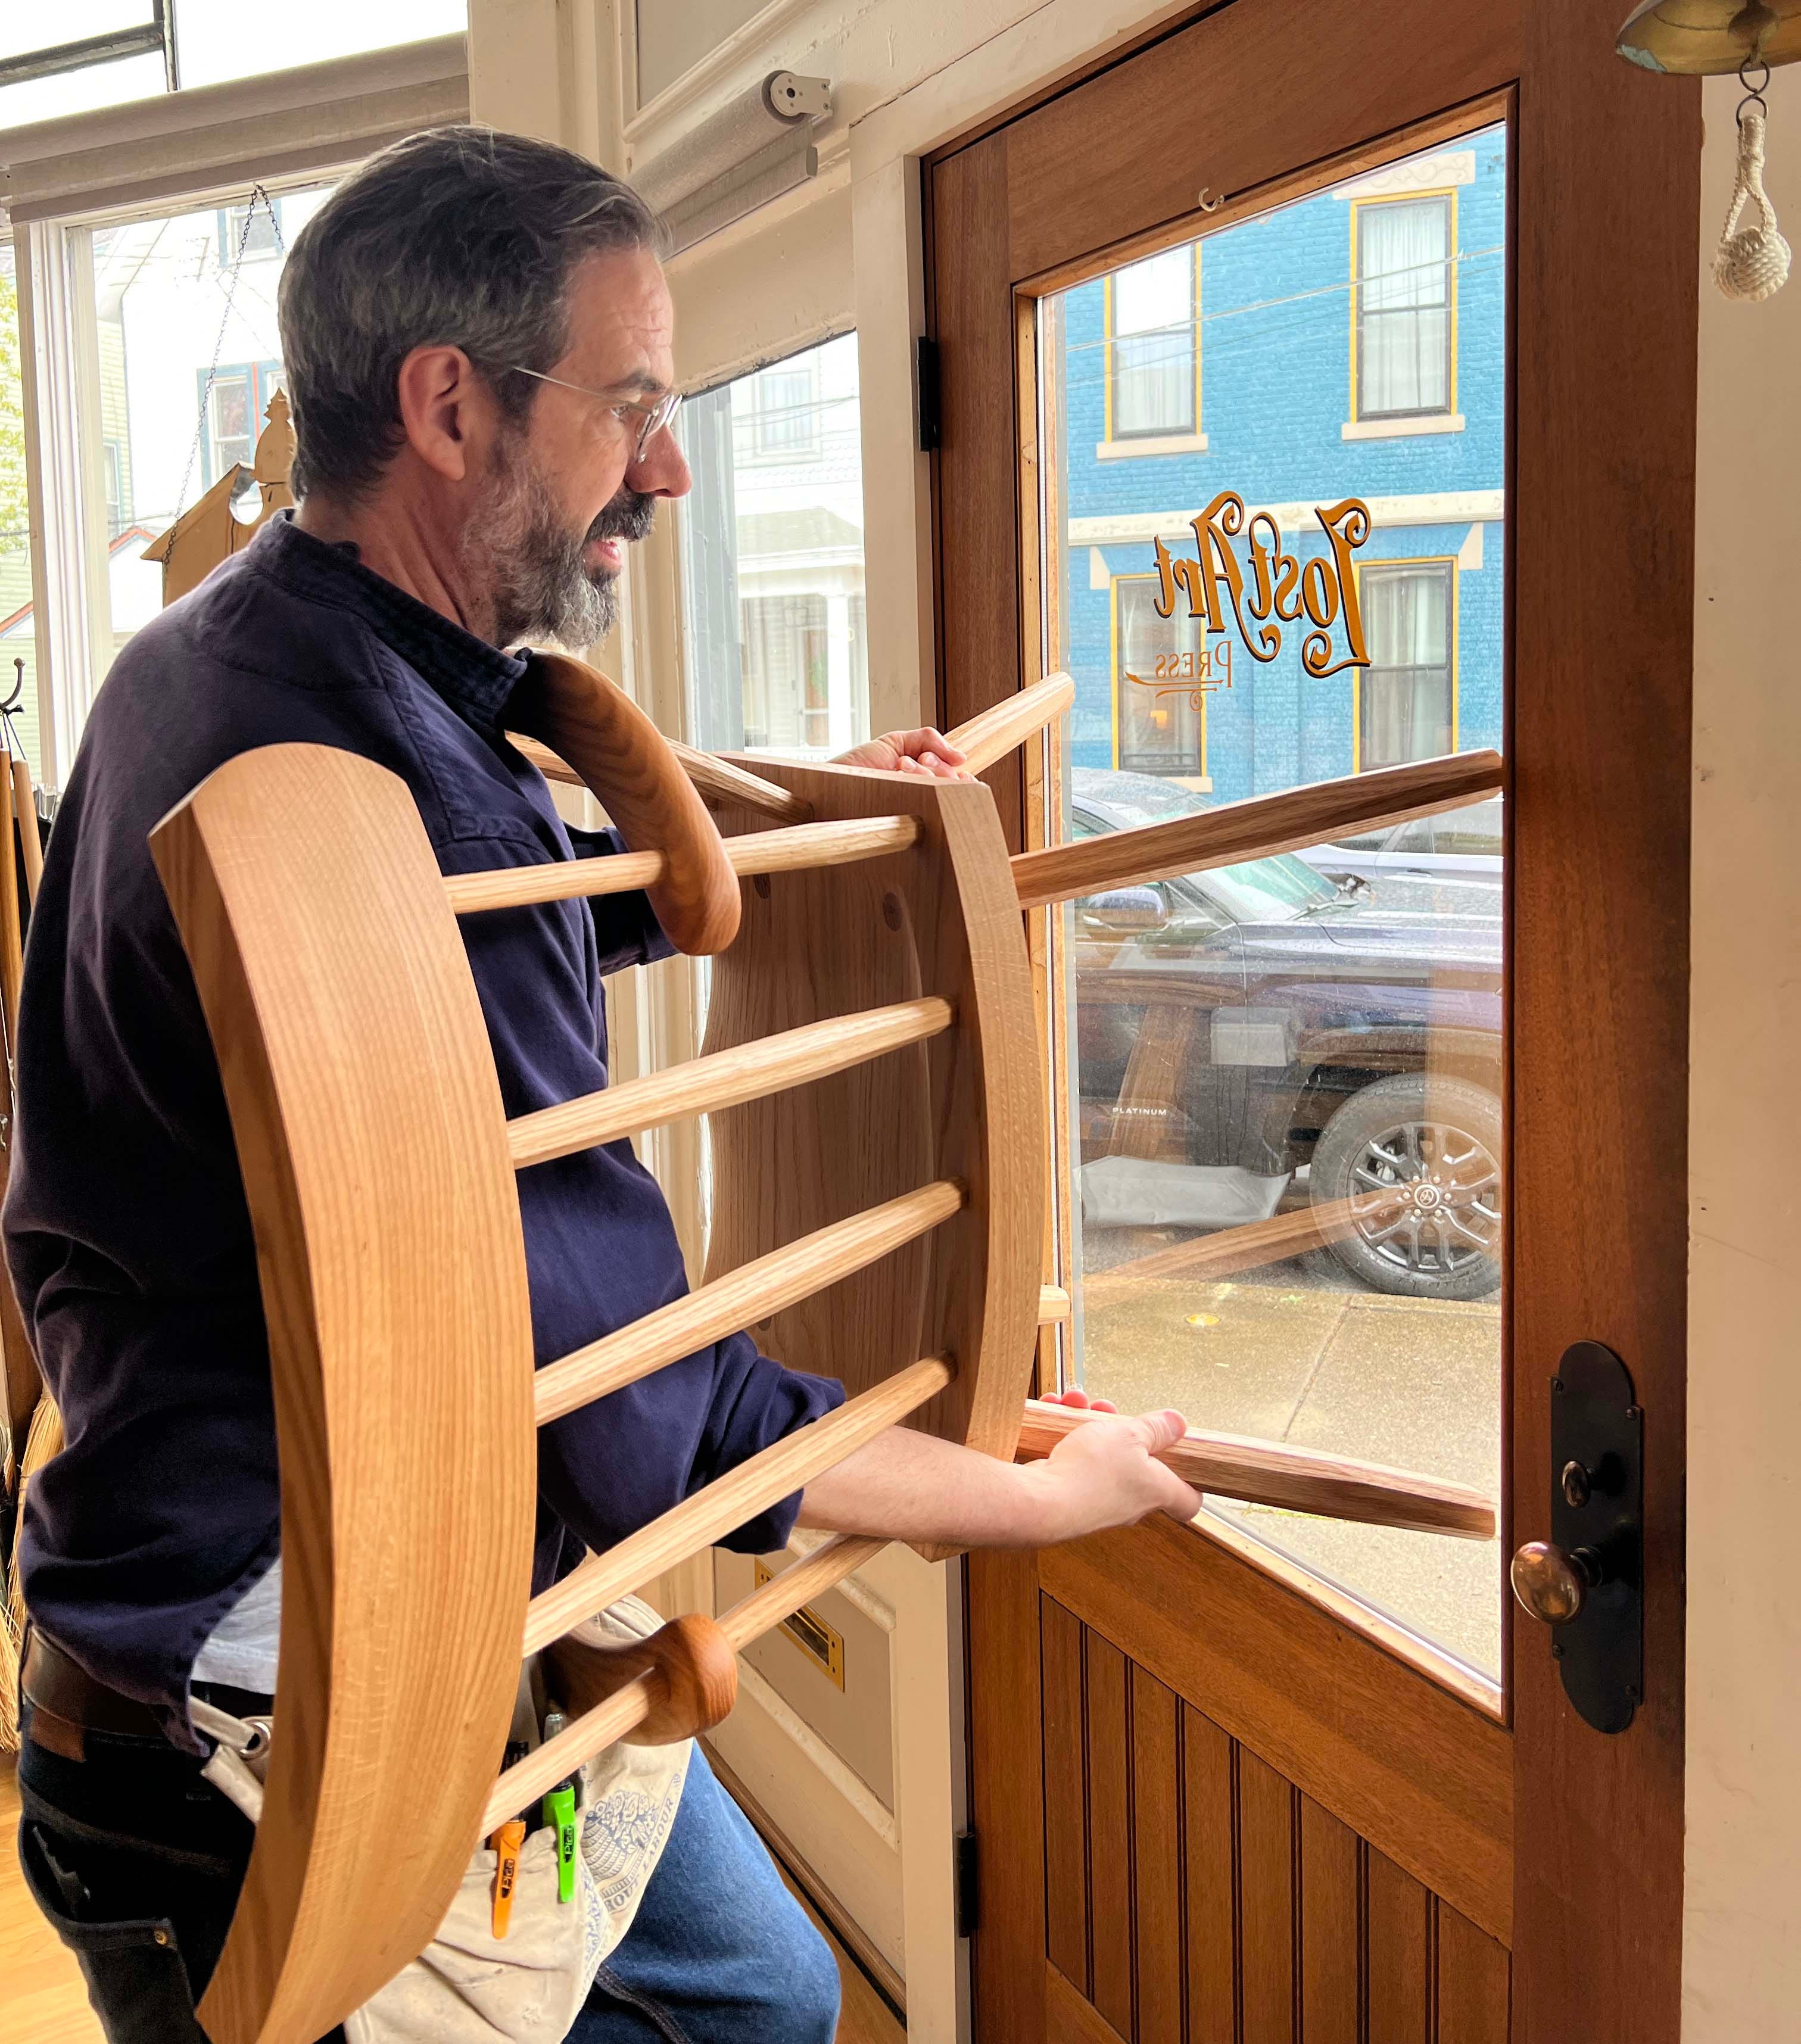
We took the chair over to the front window of the shop to test the legs against the flat plate glass. We placed the feet of her chair on the glass and tried to rock the assembly.
No rocking. Nothing. All four feet were in exactly the same plane.
Full marks to Kale. And to keeping my mouth shut.

Kale Vogt
Jan. 5, 2024
Finally, a chair that is beginning to look and feel like an actual chair. After determining my preferred seat height and sawing off the bottoms of the legs, I sat on my stool today and for the first time caught a glimpse of my future self reading a book with bourbon in hand, enjoying the warmth of my finished chair supporting me. It’s difficult not to romanticize this experience at times, while Chris’ guidance has made this month-long process seem easily attainable, the exhaustion I feel in my bones from the 10-1/2-hour work days I’ve been pulling remind me that this moment has been hard won.
Using the handsaw to remove and angle the bottom of the legs was daunting at first, then became wildly satisfying once I found my rhythm. After about 20 minutes of measured angles and cuts, I managed no rocking, meaning all the legs were, to a certain degree, level with the ground. This was confirmed by Chris’ “window test.” Because Lost Art Press is in a historic building, the only true flat surface in the shop where a chair can be tested is the front door window. The window test resembles what I imagine wrestling an octopus would look like (a joke stolen from Chris). It begins by placing the bottom of all four legs of the chair up to the front door window then rocking the chair back and forth [if it rocks] to listen and feel for any unevenness. Oh to have been a passerby during that moment…. Fortunately, I passed the window test and was able to move on without any leg length adjustments.
A Quick Tip on Leveling Legs from Chris
It’s easy to determine that a table, chair or stool has uneven legs. But it can be difficult to find the offending leg. There are methods that utilize measuring. And methods that use a table saw.
Heck, I once visited a chair shop where they put the chair on a lazy Susan. Then they positioned a circular saw that was held so the blade was horizontal. They turned on the saw and spun the chair. All four legs were sliced the same length in seconds.
Here’s how I root out the high spot.
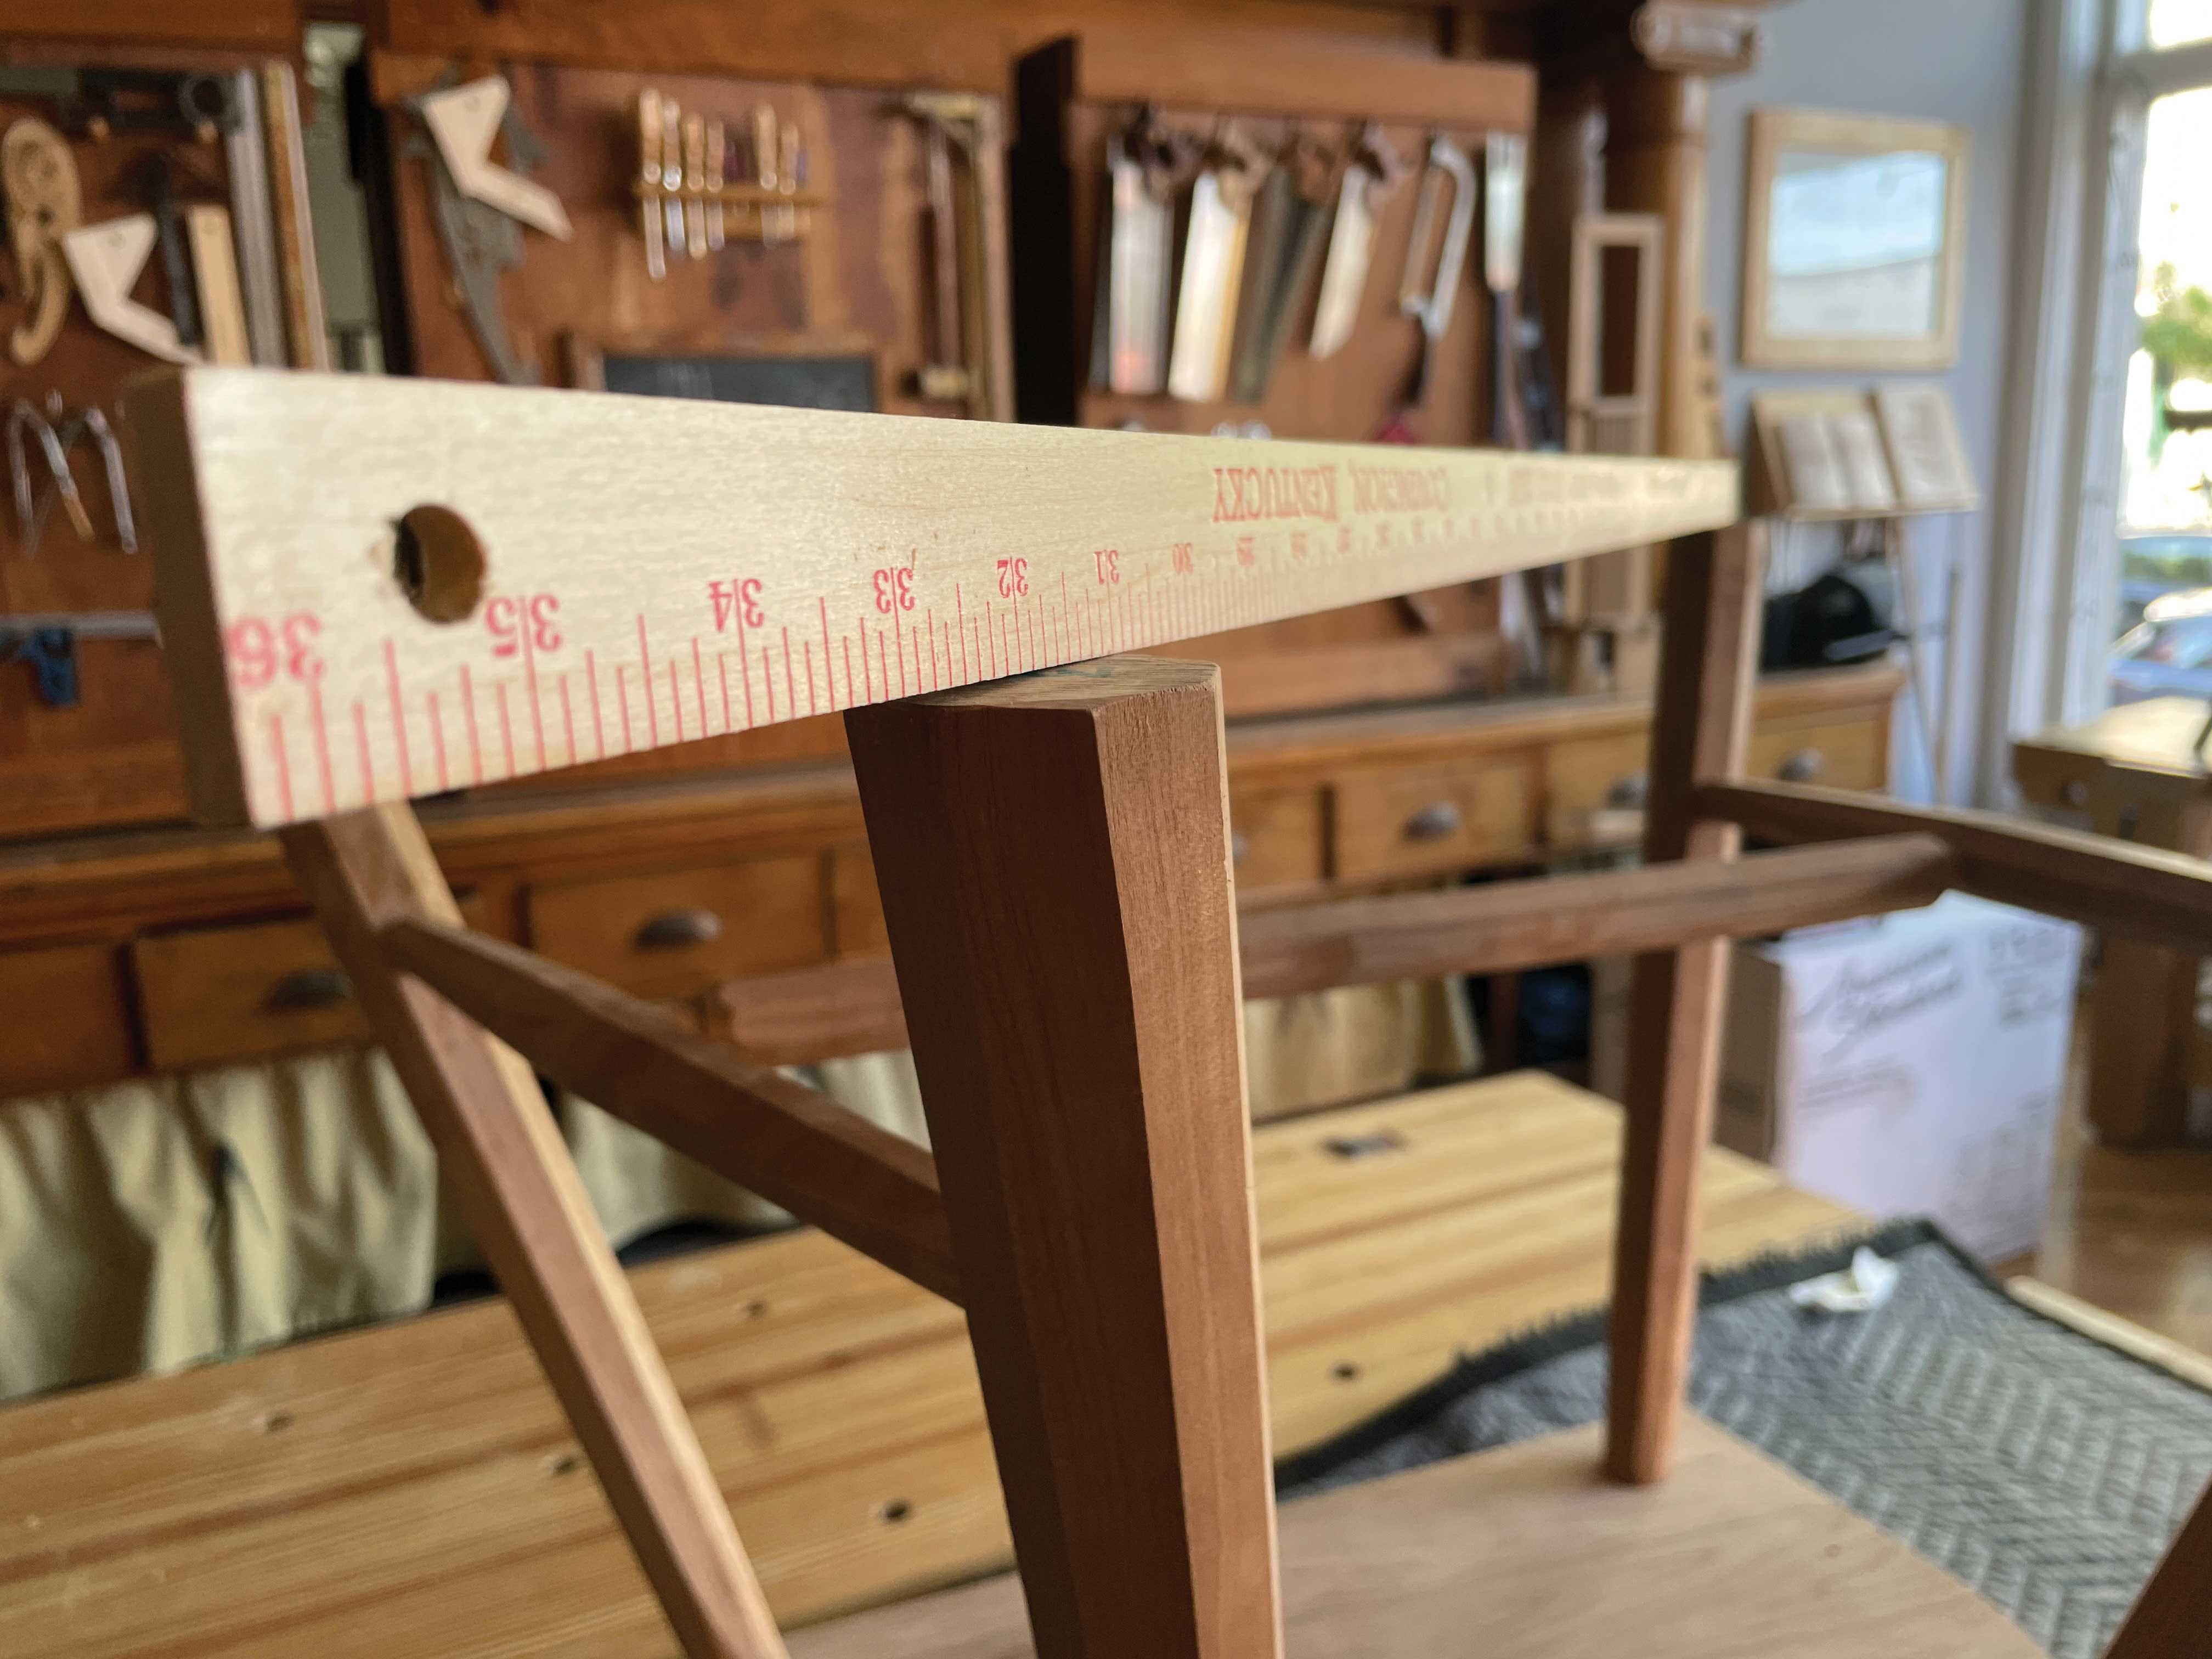
Find the long legs. These are the two that touch the floor (or glass) while the other two rock. Grab the long legs.
Put the project upside down on a bench and mark the long legs. It’s easy to get turned around.
Place a yardstick across the two long legs and look at how the feet touch the yardstick. You should be able to see a bump. Or the angle will show you which leg is too long. Also, remember that it could be both legs.
Remove the high spot using a plane, rasp, sandpaper or precision termite.
Add chair pads (the squishiness can overcome minor discrepancies). FWIW, the best we’ve found are “Wool-blend Furniture Pads” by FlexiFelt (we get them through Lee Valley Tools, but they are available elsewhere, too).
This is not a criticism -- but I stopped getting worked up about perfectly level a long time ago. I've never seen a floor that was perfectly flat or level. So a perfectly level piece of furniture rocks on my uneven floor.
Obviously, we should aim for perfection, but getting crazy about it seems to make people . . . crazy. A wee chamfer on the bottom of the legs and a felt pad is pretty perfect.
I was so afraid I would lose my balance for some reason and break the window every time I put my chair legs up to it. So glad that didn't happen!