

Drawing & Cutlists: Beware


Kale Vogt
April 24, 2024
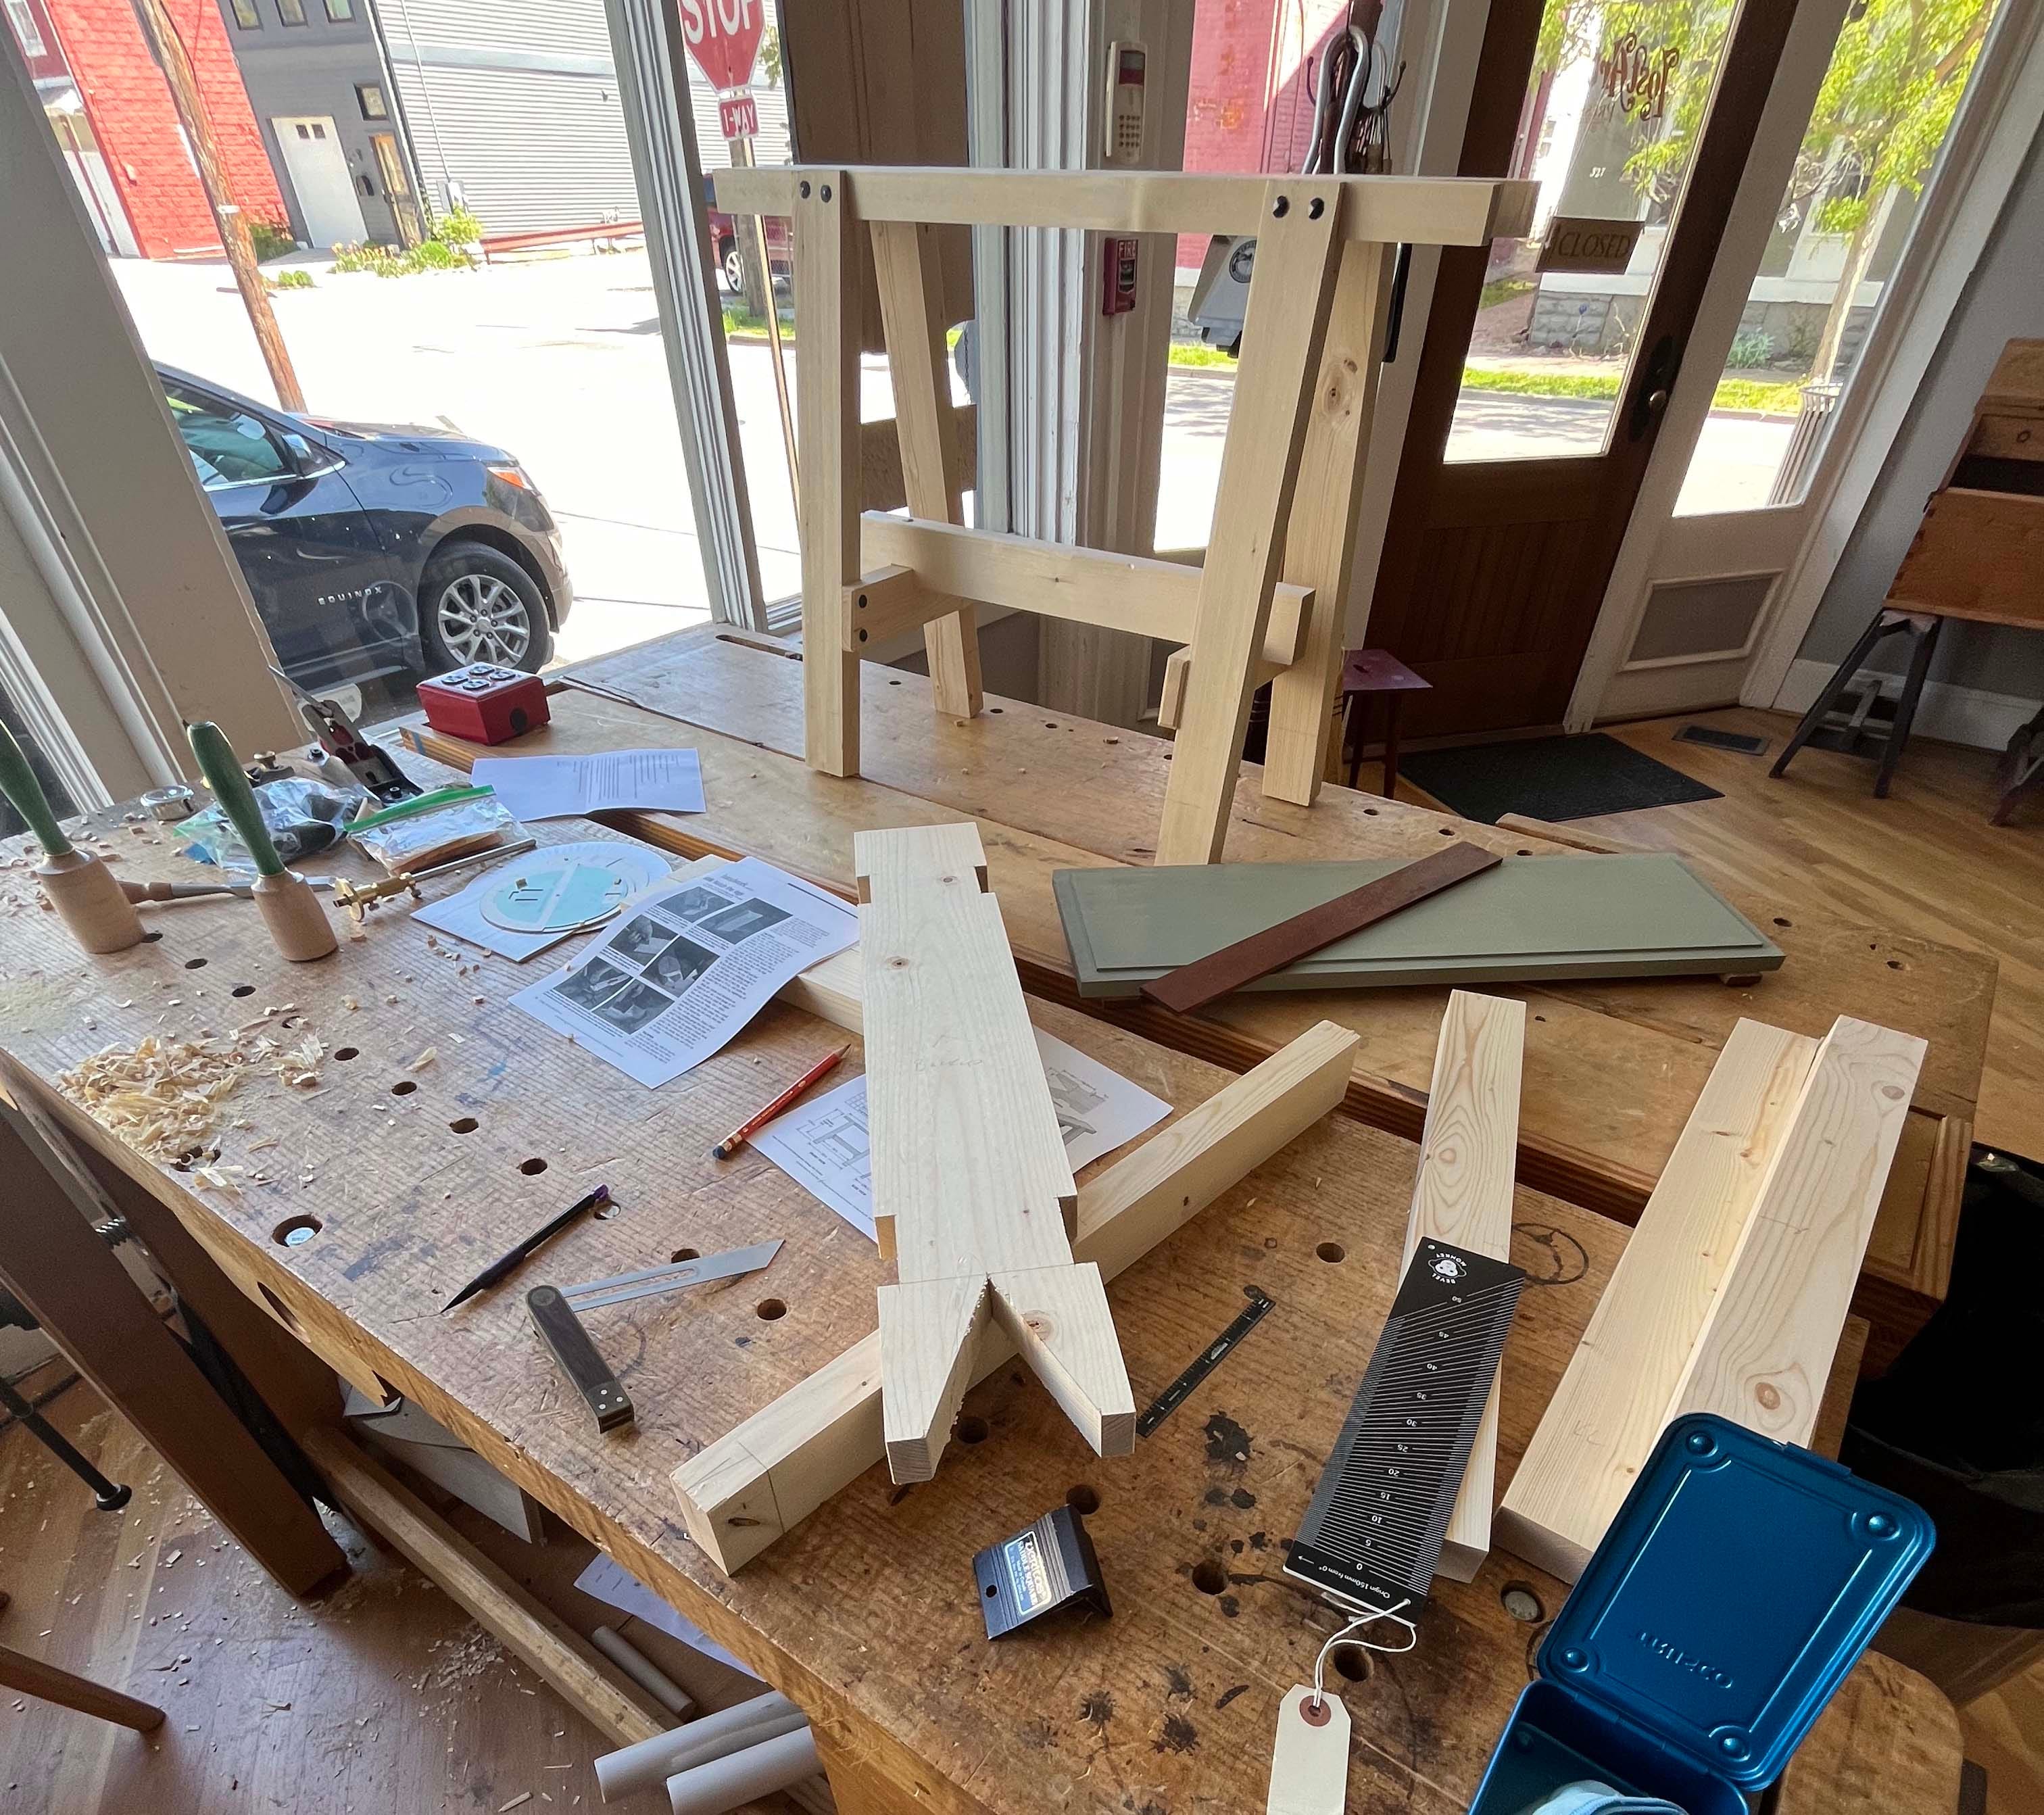
To prop up my newly built tool chest, Megan suggested I build sawbenches. Practical and multi functional. I wouldn’t say I was immediately attracted to building them, but since Megan had an extra unbuilt set of parts from a recent sawbench class I figured why not? The idea grew on me.
I went into this project keen on being as independent as possible. Yes, I’m an apprentice, I’m quite literally here to learn. But I’m eager to grow fast. Megan showed me to a “how-to” article she had written in the past on sawbenches. Illustrated plans and all. Perfect.
I laid out all the parts and got to work. I immediately recognized while reading the article that reading instructions versus listening to them means I process the words differently. I was easily thrown off reading the lingo I was barely familiar with. I began leaning on the illustrations.
“Ah yes, that’s better,” I thought, as I began deciphering the drawings.
Cut this board, at this measurement down to this depth. Easy!
Wrong.
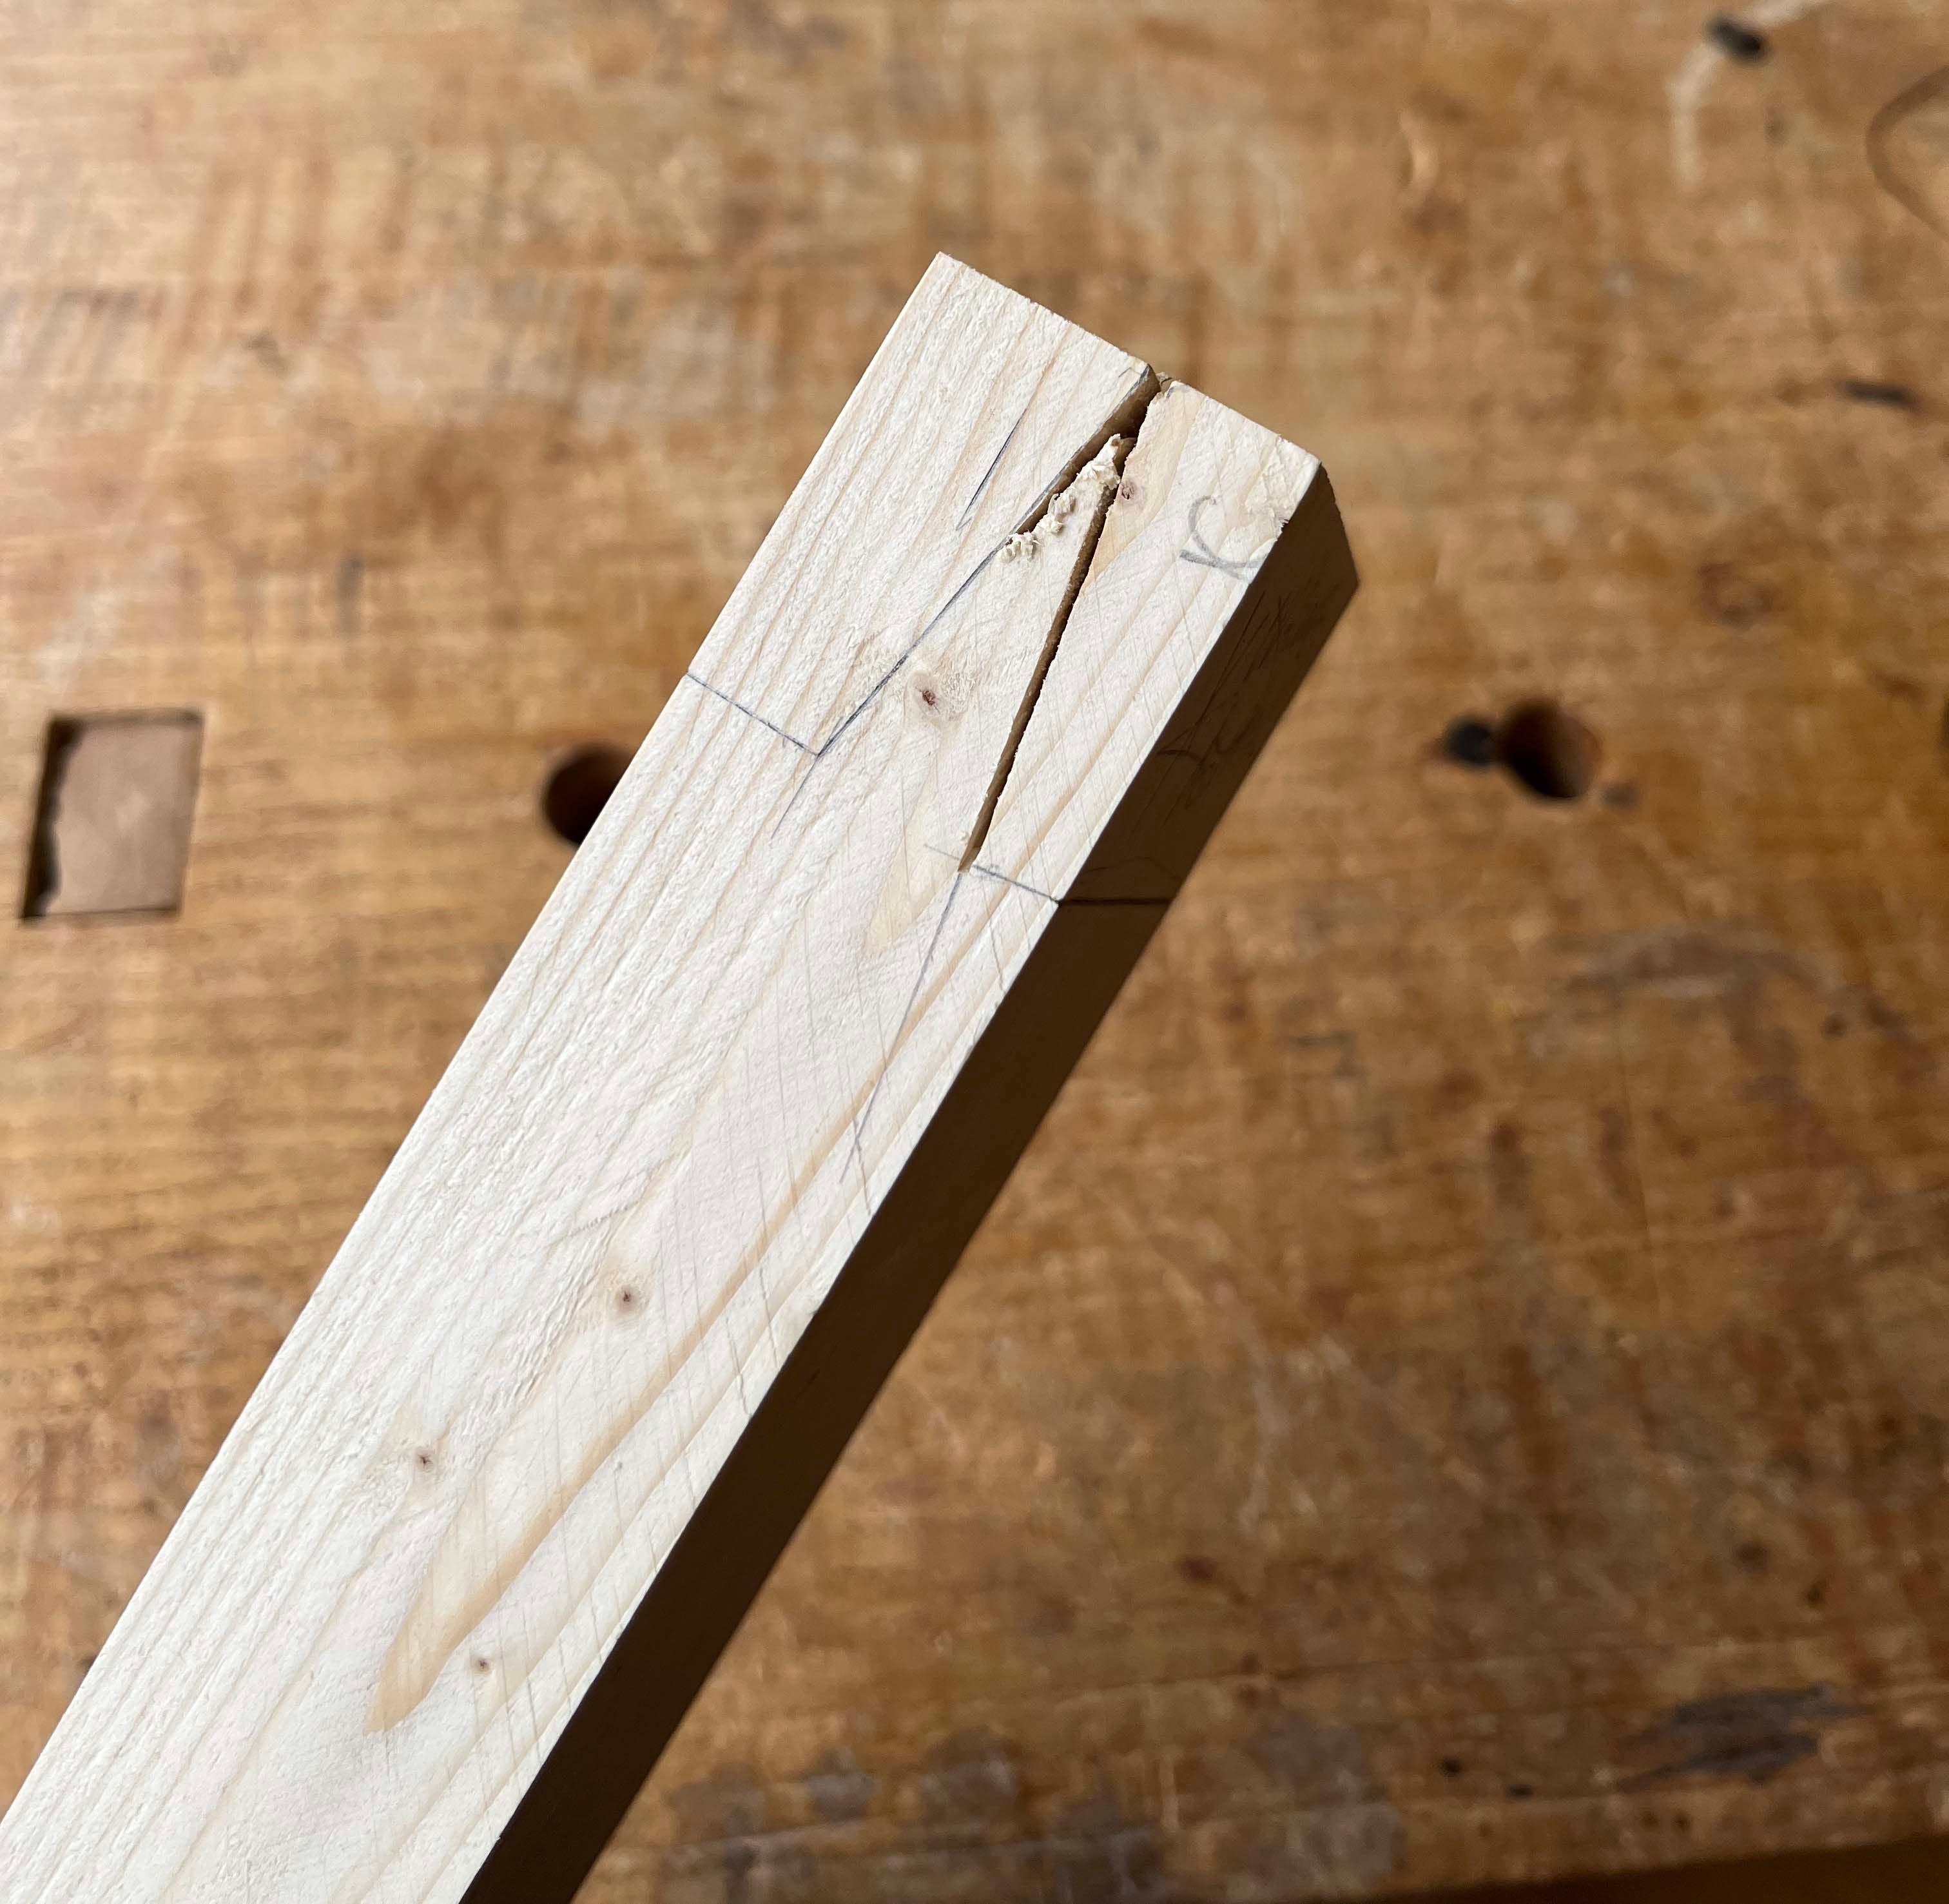
Starting out of order (according to the article), I jumped to cutting the mortises for the legs. Due to my following the imagery instead of written instruction, I — to no surprise — cut wrong. All four legs.
I eventually caved and went to Megan. Within minutes we discovered my mistake. In the image of the leg mortise, the board is slightly angled. I didn’t catch it and in turn wasted a good deal of time and energy. (Adds to mistake list.) Editor’s note: Not a waste – it’s all good practice!
Megan quickly got me back on track and I got back to work. We were able to save the legs by using the other end since they had been cut overlong.
Since that moment it’s becoming clear to me how much room I have to grow professionally and personally. Being an apprentice is still a new frontier for me. I’m learning how to be a student again. I’m not someone who is quick to ask for help. And at times I become self-conscious about being a burden to Chris and Megan’s hectic schedule. Editor’s note: We keep assuring Kale that we’re happy to answer questions. But I get it – neither Chris or I are quick to ask for help, either.
It’s easy for me to forget that I was brought here to learn. At any given moment I’m working on more than just whatever project is sitting atop my bench.
“Drawings are lying bitches.” Chris says.
You don’t say.
Christopher Schwarz
April 25, 2024
Kale is building their first project from a published plan – Megan’s sawbench from Fine Woodworking. All day I’ve been watching them look at the article, look at the layout and look confused.
When it looks like Kale is treading water, I don’t step in unless asked. I like to figure things out for myself, and I think Kale might be that way as well.
Eventually Kale went to Megan for help. It turns out the drawing was confusing. Megan explained the layout in a few minutes and then Kale was off to the races.
“Here is another thing we always say in the shop: Drawings are lying bitches,” I said.
Megan added, “As are cutting lists. Lying bitches.”
Kale replied, “That’s what grandma used to always say.”
Here’s some evidence that Kale is self-motivated. Yesterday at lunch Kale detailed their search for how Swedish furniture differs from Danish Modern. Kale had found a detailed explanation at Reddit that explained how the Danish joinery was superior, but the Swedes used lighter-colored woods and so forth.
I listened to the full explanation. It wasn’t wrong, but it was missing the “why.”
So I then explained (as briefly as possible) Kaare Klint’s story and how he is the father of Danish Modern. And how he forged a new form of furniture that combined English-style joinery with furniture forms from all over the world that were then simplified and refined. And a lot of those influences were from Sweden.
Then I showed Kale the section in our library for Danish Modern.
They dove into the books.
I was really glad to see Kale researching things on their own. But what I really want to impart is that you have to dig in the right place.
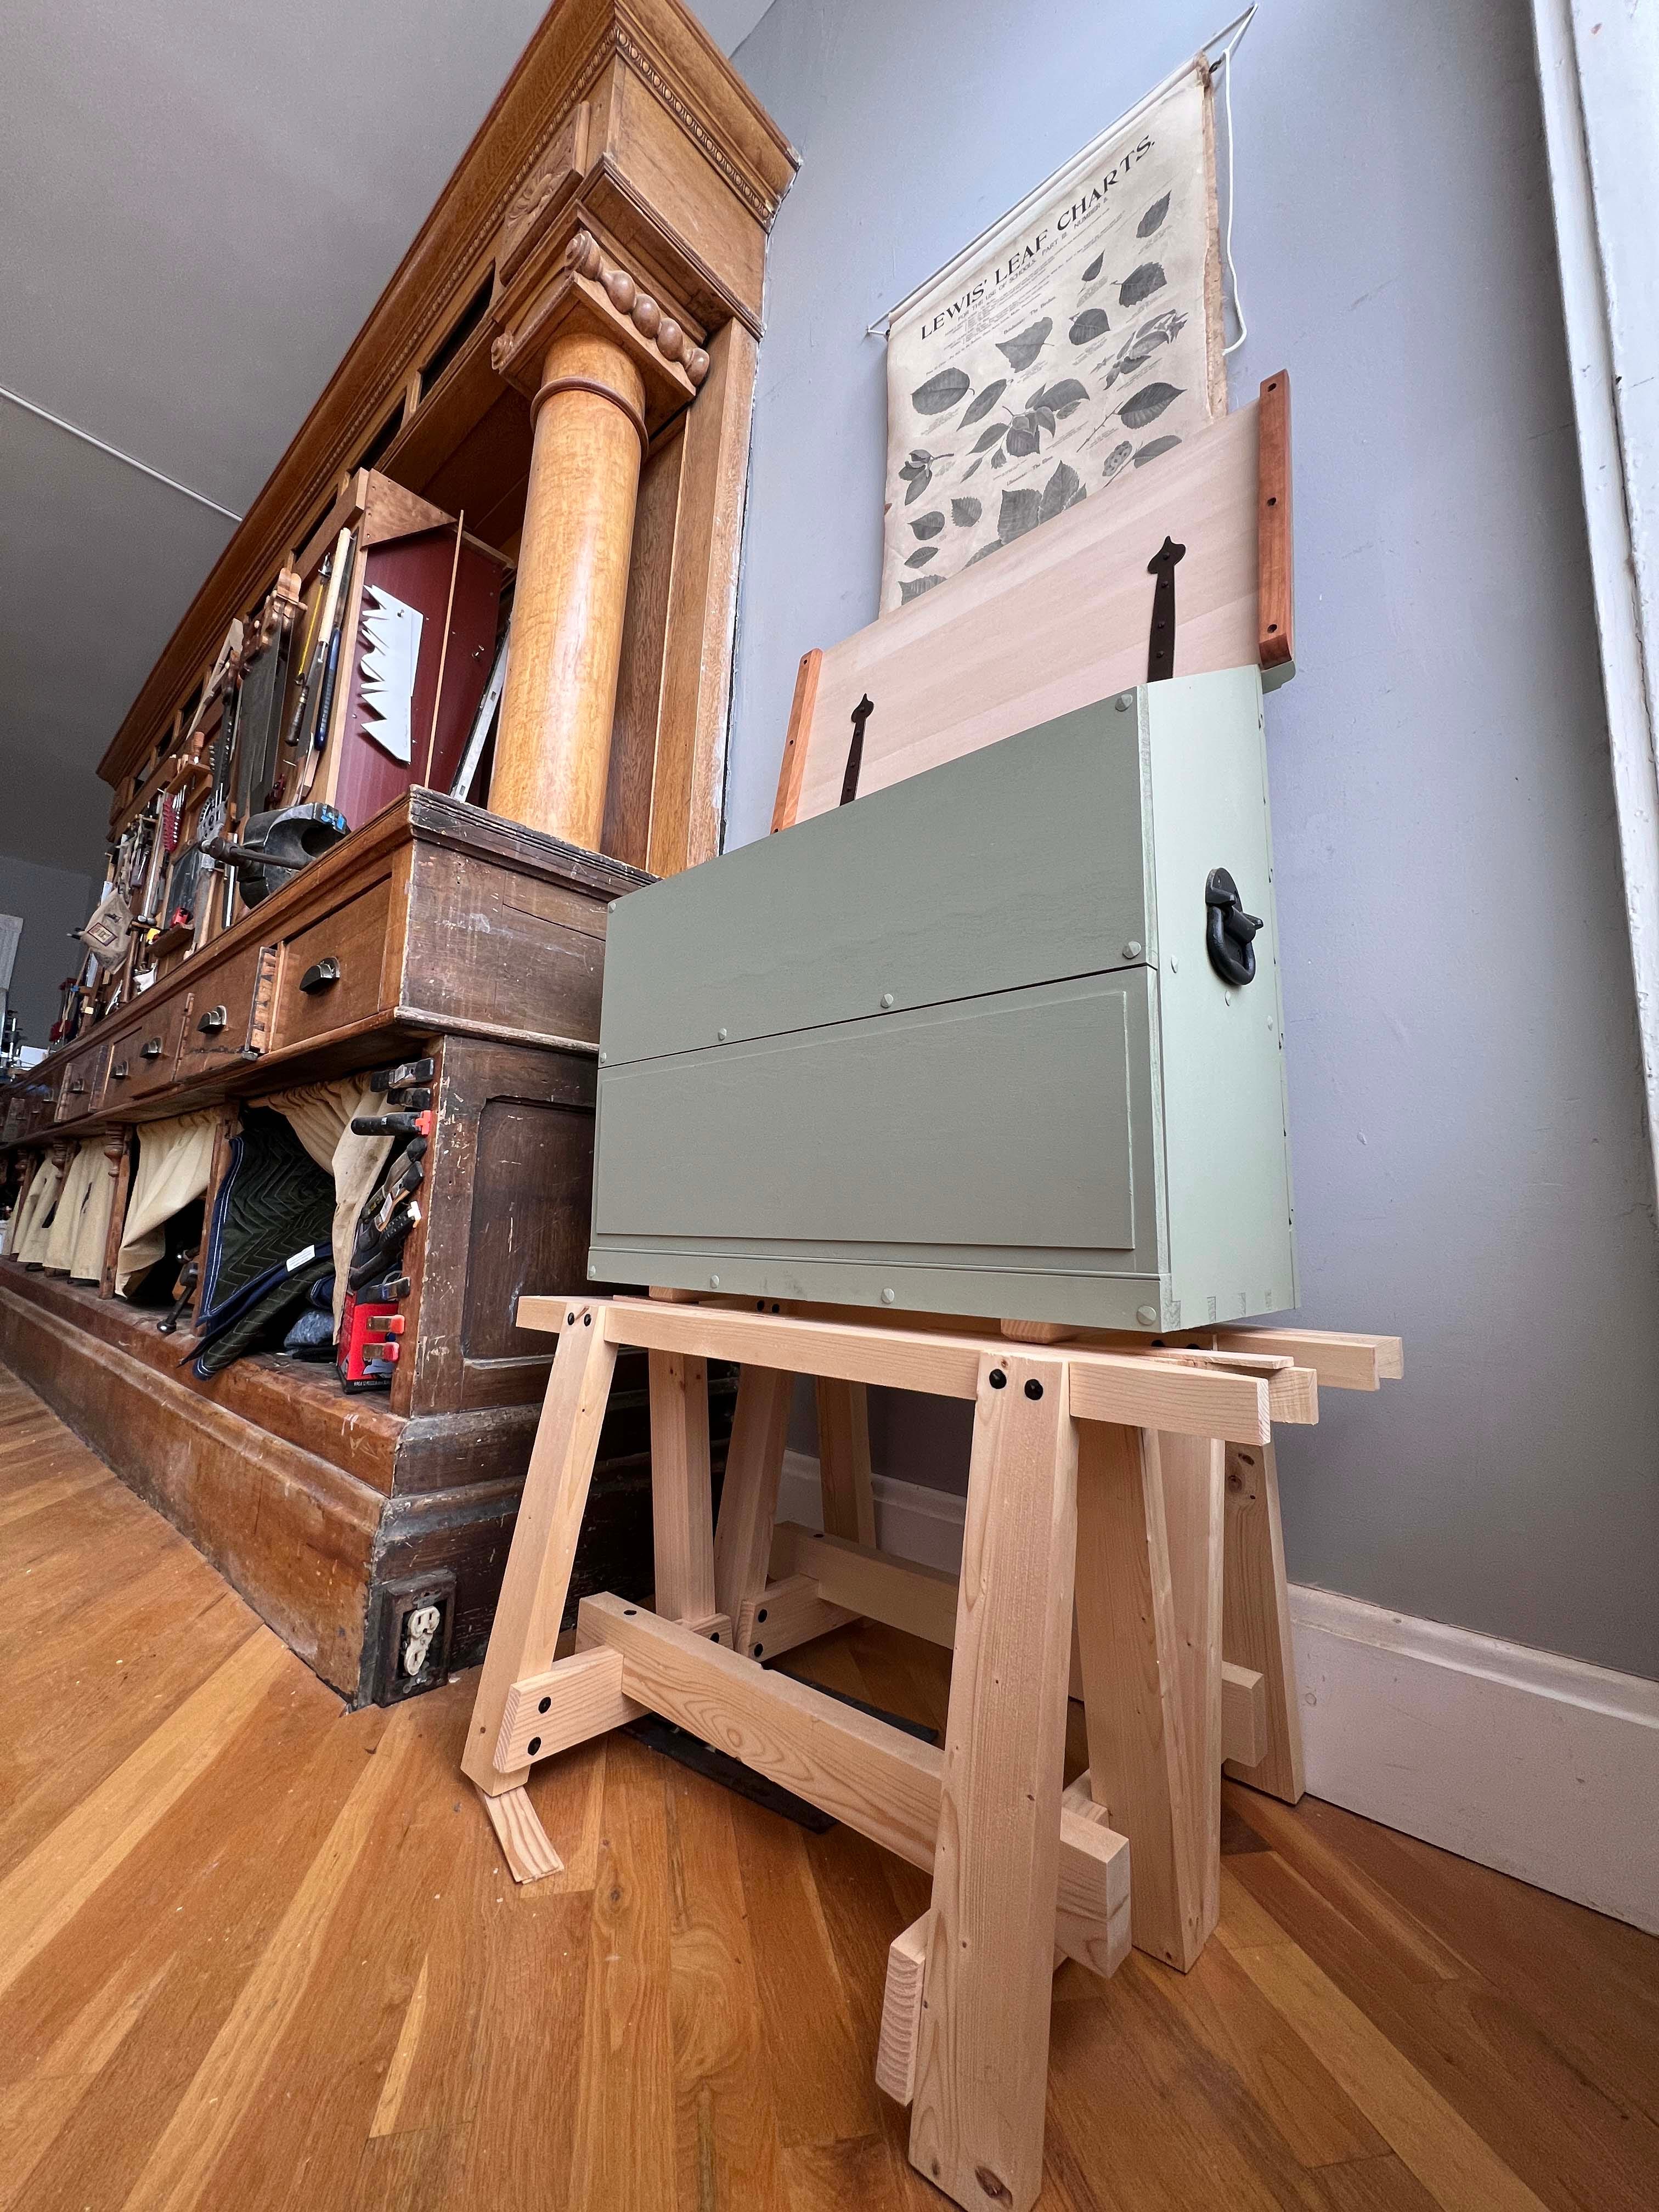
p.s. Want to build your own sawbench? My Fine Woodworking article is in issue #281 – though you need a subscription to read it. Below are my teaching notes and cutlist. Basically the article, sans explanation /explication or my comic stylings. Perhaps I should have given these notes to Kale.
– Fitz
1 Top 1-3/8” x 5 x 32
4 Legs 1-3/8 x 2-1/2 x 22
2 short braces 1-3/8 x 2-1/2 x 13-1/2
1 long brace 1-3/8 x 2-1/2 x 23
(1 10’ long 2x per)
Day 1
Legs
Ensure uglier face of each is flat; mark as “true” face.
Ensure long edges are flat and square to true face
Lay out top of notch:
Marking gauge at ½”, scribe off true face (on top)
Marking gauge at 1-1/2” scribe shoulder (off top)
Cheek and shoulder are angled 10° – set bevel gauge to 10° and mark – looks like a bird’s mouth
Saw the cheek (2nd class cut – V-nick at corner)) then shoulder (1st class)
SAVE THE WASTE
True up cheeks – line up face of jaws in handscrew and use jaws as paring block
True up shoulders if necessary w/shoulder plane
MARRIAGE MARK ON LEG BOTTOMS
Top
Underside – true face; long edges square to true face.
Lay out ripping notch (3/4” points, 5” deep); cut, clean with rasp
Knife in outside walls (4-1/2” from either ends) of legs, Second wall will be marked from legs.
Place each leg and align; knife in around it on long edge of top.
Cutting gauge & pencil to lay out bottom of notch, ½” from edge. Saw shoulders, remove rest of waist (chisel or coping saw).
Clean notch bottoms w/router plane
Glue Legs
Tape offcuts to legs; glue and clamp legs in notches.
Day 2
Short braces
True face – exterior
Top edge of short braces about 12” from underside of top (can vary a bit)
Use spacer block of desired length to mark location on inside of legs
Clamp brace in place, inside legs, true face against legs
Use knife to mark shoulders, inside and out
Mark cheek (1/2”) and angled shoulders. Cut (a la legs)
Clean up using router plane
Glue short braces to legs
Long brace
True face – uglier long edge (prettier edge will face up)
Clamp in place (centered) to short braces
Trace notch locations from short braces; lay out notches (any depth, from ½” to 1-1/4”).
Saw, remove waste. Clean bottoms
Bevel long edges, cut swoops on ends – whatever
Nails or Screws
Pilot and nail/screw in order of assembly (legs, short braces, long brace), two per
Finish
Flush cut saw – tops of legs, ends of short braces
Level bench on flat surface
Mark legs to final length (scrap block, pencil, etc)
Saw to final length
Break all edges
Finish with o/v blend (or not)
The only people who never make mistakes are people who never do anything.
This substack is simply the best reading I do every day. I feel like I'm an "Annoying Over-Commenter" but I am unable to help myself and so, I throw myself upon the mercy of the court. "Your Honor, if it please the court, I would assert that YouTube videos are also lying bitches. The defense rests."